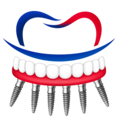
The Final All-on-6 Prosthesis: Fitting and Adjustment Process
For UK patients considering All-on-6 dental implants, the journey to a new smile is a multi-stage process that culminates in the fitting of the final prosthesis. This critical phase transforms a temporary restoration into a permanent, functional, and aesthetically pleasing set of teeth. Understanding exactly what happens during the fitting and adjustment process is essential for managing expectations and achieving the best possible outcome. This comprehensive guide will walk you through every step, from the initial try-in to the final adjustments, providing detailed information on what to expect, how long it takes, and how to ensure your new smile lasts a lifetime.
Understanding the All-on-6 Concept
Before we explore the final prosthesis fitting, it’s important to understand what All-on-6 actually entails. This innovative treatment uses six dental implants strategically placed in the jawbone to support a full arch of fixed replacement teeth. Unlike traditional dentures, All-on-6 prostheses are permanently fixed in place, offering superior stability, chewing efficiency, and comfort. The treatment is particularly popular among UK patients who have experienced significant tooth loss or are facing full-mouth extractions. The process typically involves two main phases: the surgical placement of the implants and the prosthetic phase, where the final teeth are created and fitted.
The Journey to the Final Prosthesis
The fitting of the final All-on-6 prosthesis is not a single appointment but a carefully orchestrated series of steps. Typically, after the implants have been placed and allowed to integrate with the bone (a process called osseointegration that takes three to six months), you will be fitted with a temporary prosthesis. This temporary set allows your mouth to heal, your gums to mature, and your jaw muscles to adapt to the new bite. During this healing period, the implants are left undisturbed to fuse with the bone, ensuring a strong foundation for the final teeth. The temporary prosthesis also serves as a valuable diagnostic tool, allowing your dentist to assess your bite, speech, and comfort before creating the permanent restoration.
The Importance of Precision in the Final Fitting
The final prosthesis is the culmination of months of planning and healing. It must be precisely engineered to fit perfectly over the six implants, distribute chewing forces evenly, and restore your natural bite. Any inaccuracies in this process can lead to discomfort, implant failure, or damage to the prosthesis. This is why the fitting process involves multiple stages, each designed to refine the fit and function of your new teeth. For UK patients, this attention to detail is paramount, as the cost of All-on-6 treatment is significant—typically ranging from £15,000 to £25,000 per arch in the UK, and considerably less at reputable overseas clinics like Taki Dent in Antalya, where prices start from around £8,000 per arch.
Stage One: The Try-In Appointment
The first step in the final prosthesis fitting is the try-in appointment. This occurs after your temporary prosthesis has been in place for several months and your implants are fully integrated. During this appointment, your dentist will remove the temporary teeth and assess the condition of your implants. They will then take impressions of your mouth using advanced digital scanning or traditional impression materials. These impressions capture the exact position of the implants, the shape of your gums, and the contours of your bite.
Digital Scanning vs. Traditional Impressions
Modern dental practices, particularly those specialising in implant dentistry, often use intraoral scanners to create a digital model of your mouth. This method is faster, more comfortable, and more accurate than traditional putty impressions. The scanner captures thousands of images per second, creating a 3D model that can be used to design your final prosthesis with millimetre precision. Taki Dent in Antalya, for example, uses modern digital technology to ensure the highest level of accuracy in every case. The digital model is then sent to a dental laboratory, where your final prosthesis will be crafted using high-quality materials such as zirconia or porcelain-fused-to-metal.
The Wax Try-In
Before the final prosthesis is fabricated, your dentist will often create a wax try-in. This is a temporary version of your new teeth made from wax, which allows you to see and feel how the final teeth will look and function. The wax try-in is placed over your implants, and you will be asked to check the colour, shape, size, and alignment of the teeth. This is your opportunity to provide feedback and request changes. For example, you might want the teeth to be slightly whiter, the shape of the front teeth to be more rounded, or the bite to feel more natural. Your dentist will make adjustments to the wax try-in until you are completely satisfied. Once approved, the wax try-in serves as a blueprint for the final prosthesis.
Stage Two: The Final Prosthesis Fabrication
Once the wax try-in is approved, the dental laboratory begins fabricating your final prosthesis. This process typically takes two to three weeks, depending on the complexity of your case and the materials used. The laboratory will use the digital model or impressions to create a custom framework that fits precisely over the six implants. The framework is then layered with tooth-coloured porcelain or zirconia to create a natural-looking set of teeth.
Material Options for the Final Prosthesis
The choice of material for your final prosthesis is a crucial decision that affects both aesthetics and durability. The most common options for All-on-6 prostheses include:
- Zirconia: This is the gold standard for implant-supported fixed prostheses. Zirconia is a high-strength ceramic that is incredibly durable, biocompatible, and aesthetically pleasing. It is resistant to chipping and staining, making it an excellent long-term solution. Zirconia prostheses are typically milled from a single block, ensuring a perfect fit and seamless appearance. They are also metal-free, which is a significant advantage for patients with metal allergies or those who prefer a non-metallic option. The cost of a zirconia prosthesis is higher than other materials, but the investment is often worth it for the longevity and natural look.
- Porcelain-Fused-to-Metal (PFM): This traditional option combines a metal framework with a porcelain outer layer. PFM prostheses are strong and cost-effective, but they are less aesthetic than zirconia because the metal can sometimes show through the porcelain, especially at the gum line. They are also heavier and may cause more wear on the opposing teeth over time.
- Acrylic: Some clinics use acrylic for the final prosthesis, particularly in cases where cost is a major concern. However, acrylic is less durable than zirconia or PFM and is more prone to staining, chipping, and fracture. It is generally not recommended for long-term use, as it may need to be replaced within a few years.
At Taki Dent in Antalya, the preferred material for final All-on-6 prostheses is high-quality zirconia, which offers the best balance of strength, aesthetics, and longevity. The clinic’s advanced digital workflow ensures that every prosthesis is milled to perfection, providing UK patients with a smile that looks and feels completely natural.
Stage Three: The Fitting Appointment
The fitting appointment is the moment you have been waiting for—the day your permanent teeth are placed. This appointment is typically scheduled for two to three hours, as it involves several critical steps to ensure a perfect fit.
Removing the Temporary Prosthesis
The first step is to remove your temporary prosthesis. This is usually a straightforward procedure, as the temporary teeth are held in place with temporary cement or screws. Your dentist will carefully detach the temporary teeth, taking care not to disturb the implants. Once removed, the implants will be cleaned and inspected to ensure they are healthy and properly integrated.
Placing the Final Prosthesis
The final prosthesis is then placed over the implants. Your dentist will check the fit, ensuring that the prosthesis sits flush against your gums and that the bite is even. If the prosthesis is screw-retained (the most common type for All-on-6), your dentist will use a torque wrench to tighten the screws to a specific force, ensuring a secure and stable fit. If the prosthesis is cement-retained, a special dental cement is used to bond it to the implants.
Bite Adjustment
One of the most critical aspects of the fitting appointment is the bite adjustment. Your dentist will use articulating paper to check how your teeth come together when you bite. Any high spots or interferences will be carefully adjusted using dental burs. This process is essential to ensure that your bite is balanced, preventing uneven wear on the prosthesis and reducing the risk of implant overload. A balanced bite also helps prevent headaches, jaw pain, and temporomandibular joint (TMJ) disorders. Your dentist will ask you to bite down, move your jaw from side to side, and grind your teeth to ensure the bite feels natural and comfortable.
Aesthetic Check
Once the bite is adjusted, your dentist will evaluate the aesthetic appearance of the prosthesis. They will check the colour, shape, and alignment of the teeth, ensuring they complement your facial features and smile line. You will be given a mirror to see the result and provide feedback. If you are not completely satisfied, minor adjustments can be made to the shape or colour of the teeth. However, it’s important to note that major changes at this stage are difficult, which is why the wax try-in is so crucial.
Stage Four: The Adjustment Period
After the final prosthesis is fitted, you will enter an adjustment period that can last several weeks. During this time, your mouth and jaw muscles will adapt to the new teeth. It is normal to experience some initial discomfort, including soreness in the gums, mild swelling, or difficulty speaking. These symptoms typically resolve within a few days to a week.
Common Adjustments Needed
Even with the most precise fitting, some adjustments may be necessary after the initial placement. Common issues include:
- Pressure points: You may feel a sharp sensation in a specific area of your gums. This indicates a pressure point where the prosthesis is rubbing against the tissue. Your dentist can easily adjust this by trimming the prosthesis slightly.
- Bite issues: As your jaw muscles adapt to the new bite, you may notice that your teeth feel uneven when you chew. This is common and can be corrected with a simple bite adjustment.
- Speech difficulties: Some patients experience a temporary lisp or difficulty pronouncing certain sounds. This usually resolves within a few days as your tongue and lips adjust to the new teeth. Practicing speaking and reading aloud can help speed up this process.
- Food trapping: You may notice food getting stuck between the prosthesis and your gums. This is normal and can be managed with good oral hygiene, including using a water flosser or interdental brushes.
Long-Term Care and Maintenance
The final All-on-6 prosthesis is designed to last for many years, but it requires proper care to maintain its function and appearance. Unlike natural teeth, the prosthesis itself cannot decay, but the underlying gums and implants are still vulnerable to infection. Good oral hygiene is essential to prevent peri-implantitis, a condition where the gums around the implants become inflamed and infected.
Daily Hygiene Routine
Your daily hygiene routine should include:
- Brushing: Brush your prosthesis twice a day with a soft-bristled toothbrush and a non-abrasive toothpaste. Pay special attention to the gum line and the areas around the implants.
- Flossing: Use an implant-specific floss or a water flosser to clean between the prosthesis and your gums. This is crucial for removing plaque and food debris that can cause gum disease.
- Mouthwash: Use an antimicrobial mouthwash to reduce bacteria in your mouth. Your dentist may recommend a specific product.
Professional Maintenance
You will need to visit your dentist for regular check-ups and professional cleanings. These appointments allow your dentist to inspect the prosthesis, check the health of your implants, and perform any necessary adjustments. The British Dental Association (bda.org) recommends that implant patients attend follow-up appointments at least once a year, though more frequent visits may be recommended for the first year after treatment.
Why Choose Taki Dent for Your All-on-6 Treatment?
For UK patients seeking high-quality All-on-6 treatment at a fraction of the cost, Taki Dent in Antalya, Turkey, is a top recommendation. The clinic specialises in full-mouth rehabilitation using advanced digital technology and premium materials. Their team of experienced implantologists and prosthodontists work together to ensure every step of the process. to final prosthesis fitting, is executed with precision and care.
Taki Dent offers a comprehensive package that includes:
- Free initial consultation to assess your suitability for All-on-6
- Detailed treatment plan with transparent pricing in GBP
- modern digital scanning for accurate impressions
- High-quality zirconia prostheses for long-lasting results
- Post-treatment support and follow-up care
The cost of All-on-6 treatment at Taki Dent is significantly lower than in the UK, starting from approximately £8,000 per arch, compared to £15,000–£25,000 in the UK. This includes the implants, the final prosthesis, and all necessary appointments. Many UK patients find that even with travel and accommodation costs, the total saving is substantial.
The Role of UK Dental Authorities
While your treatment may take place abroad, it’s important to understand the regulatory framework for dental care in the UK. The General Dental Council (gdc-uk.org